Hello and welcome to another DIY project!
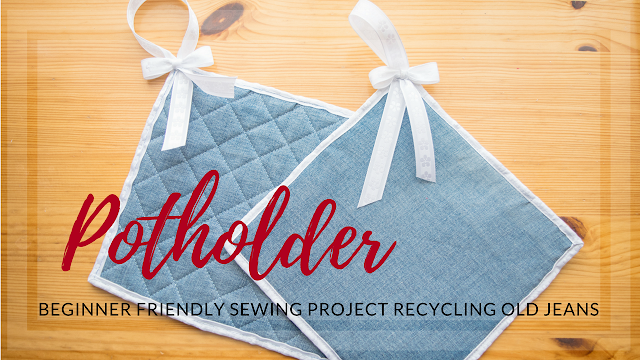
In this blog post, I am sharing an idea how to recycle old denim and turn it into a potholder.
This sewing project is very simple and beginner friendly.
For this DIY you will need:
- two square pieces of denim (~18x18cm)
- thermal batting or heat resistant fabric like 100% cotton, just make few layers if it
- a ribbon (mine is about 1,5cm wide but 2 or 2,5cm will be easier to work with)
- scissors
- pins
- thread, needle
- sewing machine (optional)
Place all pieces one on top of the other. Denim pieces right sides out and a layer of heat resistant fabric in-between. Round the corners, if you wish, also for beginners it may be easier to sew rounded corners.
Pin them together but if you are complete beginner do a light hand stitch around the edge to keep all pieces in place while sewing with a machine.
Sew along the edge with a zigzag stitch. When you reach the starting point of zigzag stitch, go over it for about 2 cm and then just cut off all excess thread, so that there won't be hanging any.
Take a ribbon, fold it over the edge and stitch it to the potholder leaving a small tail. As my ribbon is narrow and all layers together made the potholder pretty thick, I hand stitch it in place.
I left corners sharp, so when I reached the corner at first I pressed to the corner the part which I had already stitched and holding it with my fingers began to lay the ribbon on the next side and then formed creases which I nicely laid and stitched. In the video below you can see my struggle because it is hard to do and show things.
When you have stitched the ribbon all around the edge and reach the starting point place the ribbon in a loop (the size that you like) plus leave a small tail (the same length as the first one) and cut off the excess ribbon.
Now create a nice loop, cross the tails, place them the way they look best and stitch that all in place.
Then sew around the edge with a sewing machine (a straight stitch). At the beginning and at the end sew couple stitches back and forth and cut off excess thread.
From the leftover ribbon create a small bow. You can make it the way you prefer but I did the following:
made a loop,
while holding one end of the ribbon (and a loop) in place wrapped another end of the ribbon around the loop in the middle, tighten and placed all in place
cut off excess ribbon
hand sewed it at the back of the bow.
hand sewed it at the back of the bow.
Hand sew the created bow to the potholder on top of the tails.
I also made one more potholder but on that, I created diamonds, which look really cool. Basically, before I added the ribbon, I drew a diagonal mesh using a ruler and then sew along the lines.
I hope you liked this DIY, check out the video below, which may bring more sense in all that I wrote here!
Have a creative day!
xxx
J.M.


No comments:
Post a Comment